The Sopwith Camel F1
25 July 2025
In this blog, I am going to describe the process of putting together the Heroic and Ros 6mm Sopwith Camel Kit, Gwa101. I was very keen to begin my work on the WW1 - Air warfare project. I know its another ongoing project but I was reading "Biggles, The Camels are Coming" and I got hooked. Now the search was on and having looked into the various ranges, I decided on the 6mm Heroics and Ros (H&R) range and while online I found and bought the kits direct from their website https://www.heroicsandros.co.uk/shop/WW1-c39347029
I of course chose the WW1 British, then searched for Aircraft and picked the Sopwith Camel and at £1.70 per plane my British Flight would only cost me £6.80. If you included the aircraft bases and rods which come in at £1.10 for two, then my total outlay for the British Flight is £7.90. There are very few pictures on the website so far, which is a shame but I had to go with the basic descriptions and hope we have chosen correctly. As it turned out I did.
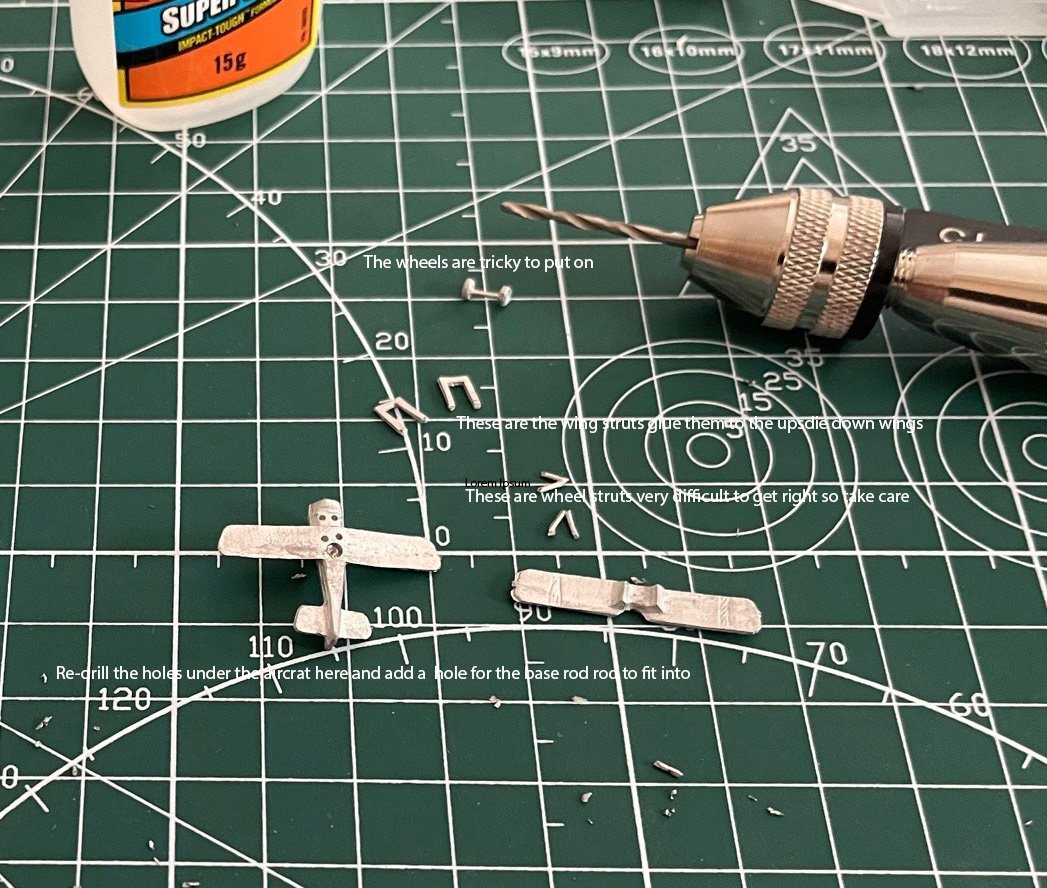
Here is the first Sopwith Camel laid out and the smaller bits are cut straight from the sprue. The kit itself has seven parts and here they are in order of the least amount of work to put together.
- The top wing comes ready to use
- The struts are ready to be stuck on (be careful to face the struts angling to the back where the cut-out is)
- Main body of the aircraft, wheel strut holes (the 4 holes needed to be made a bit larger)
- Main body of the aircraft, base rod (I used 3 drill bits, smaller to larger, to create a hole for the base rod )
- The wheel struts (these are very difficult to place correctly and you will have just go with what it)
- The wheels (will invariably look wonky on the wheel struts, but I think some paint will sort that out)
The process of finding out what I was doing with each part for the first model was a bit tortuous. But I got there by looking at a blog I found with some complete H&R planes already built and used it as a guide http://mojobob.com/wargaming/images/micros/fitzheroicsandros/fitzheroicsandros.html Go here and click on the little aircraft icon.

You can sands off the edges a bit at this stage but I waited until all were assembled and dry.

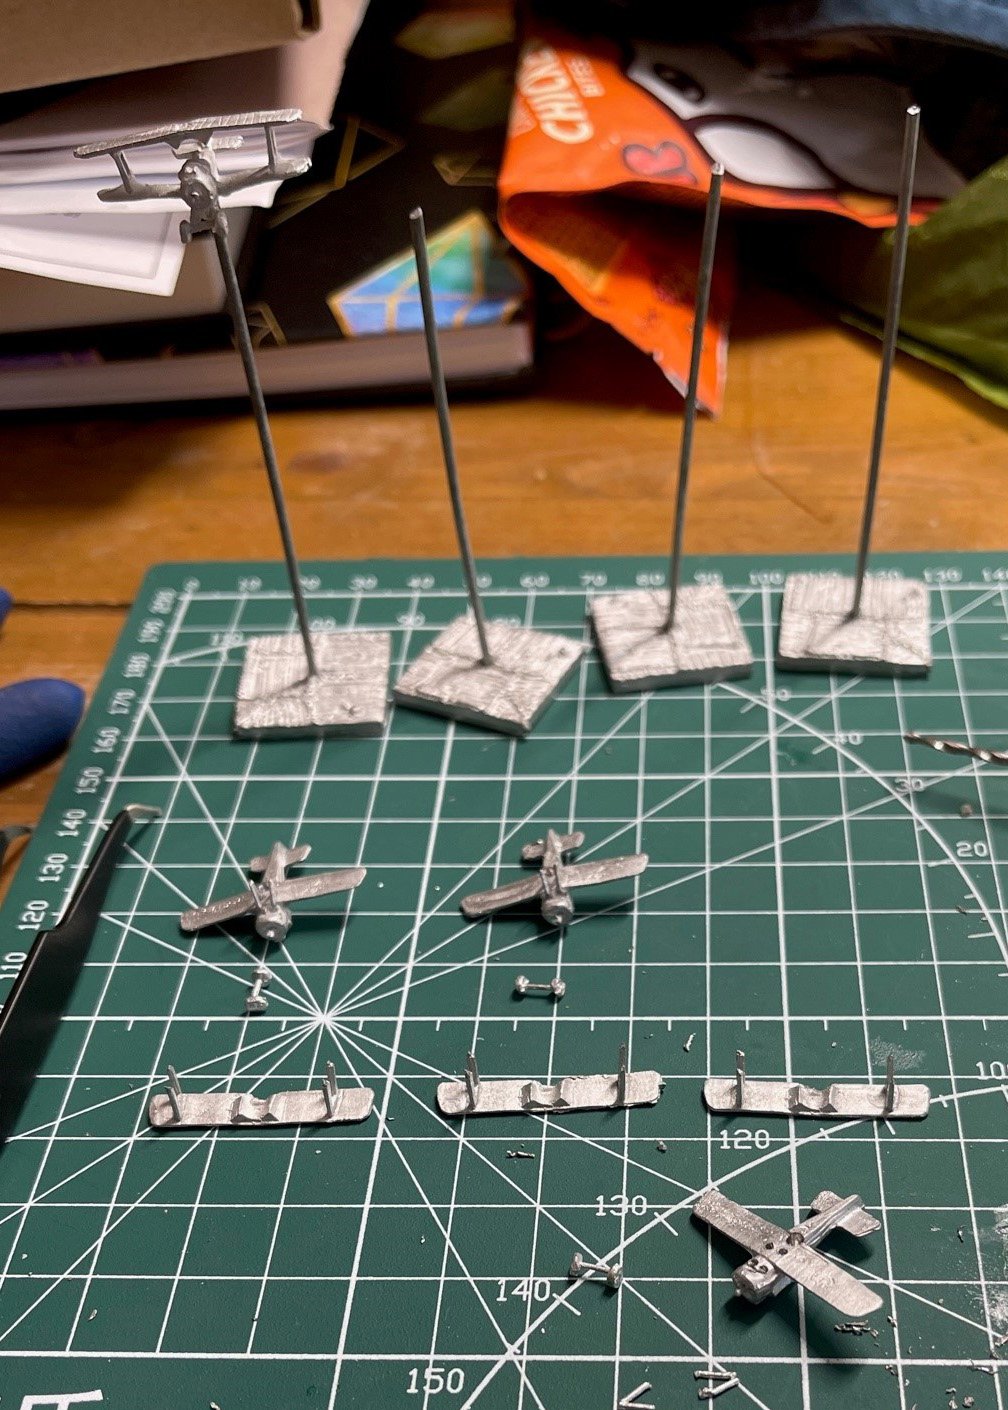
The base and base rods were the easiest to complete although I did have to drill the base hole for the rod to make it a tiny bit bigger, however once glued and cut to size they were perfect for the job. Well worth £1.10 each I would say.
All in all, the wheels don't look too bad, the wing struts are the right way around and re-drilling the holes has paid dividends. This was my first one built and tricky it was too, now it's time to set up the production line for the next three planes.
Once I knew a little bit more about what I was doing I put in the production line process. Place all the main pieces down in order, cut each piece of its sprue, glue the plane struts on the top wings, put the wheel struts on then put the wheels on and finally put the top wings on the main body of the aircraft. Be careful to let the pieces dry properly when glued, this will give a good strong model when handling and pay you back with some good results.
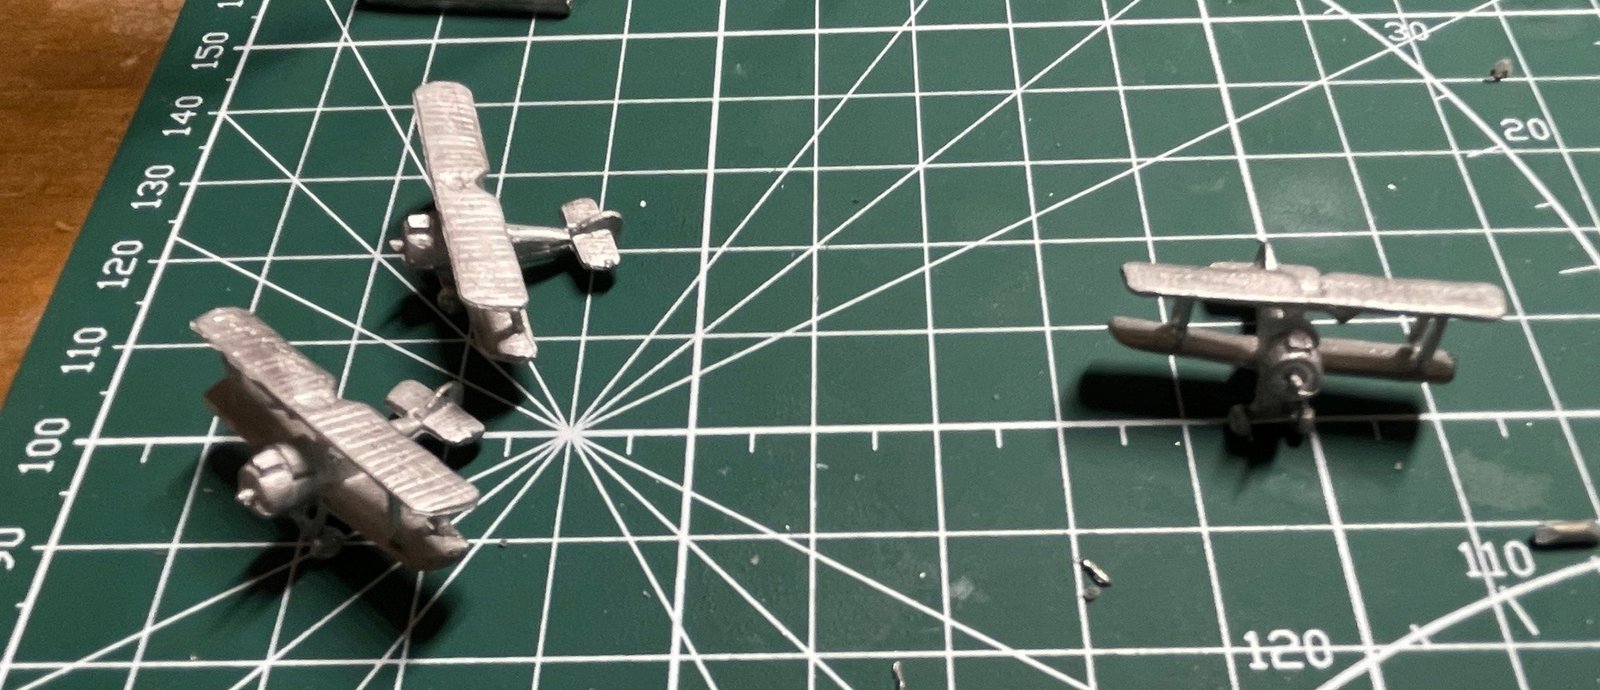
The result of a good production line is that I managed to finish these three in the same amount of time as I took doing the first one, still fiddley but much faster on getting it right the first time.

And here they are in all of their glory flying in formation and turning to meet the Hun over the trenches of northern France. So they are now ready to be painted as well leaving me five more flights to build after my summer holiday.
One French, one American, and three or four German flights depending on flight strengths. So I will update the blog when I have finished each one by doing a build blog and painting blog in the future.